Lab Work
In this lab, I will guide you through the process of setting up an Active Directory home lab environment.
Note: that the prerequisite for this walkthrough is the ability to install various virtual machines, including both Windows and Linux distributions, on your virtualization platform of choice.
Below is an overview of my lab setup, with both VirtualBox and VMware running concurrently. The network adapter is configured with a bridged adapter, ensuring that all machines connect to the same logical switch for seamless communication.

Languages and Utilities Used
Environments Used
Download the above Utilities and Environment used
Server 2019 configuration
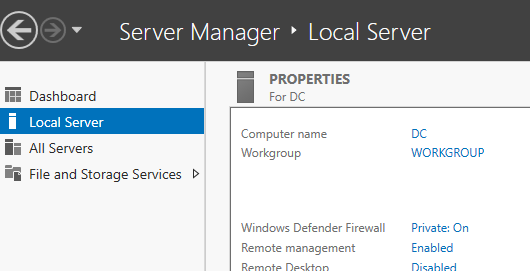
After installing Server 2019 and Windows 10 on VirtualBox, log in to your Server 2019. Navigate to Server Manager >> Local Server to rename your server to DC1 (Domain Controller 1).
Select "Computer name (DC)" to initiate the process of changing the name.
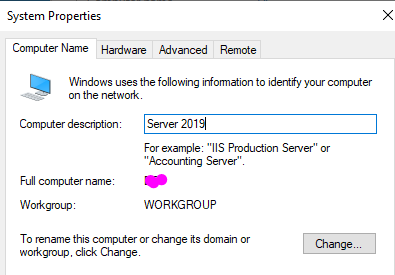
I utilized 'Server 2019' as my computer description and clicked on the "Change" button.
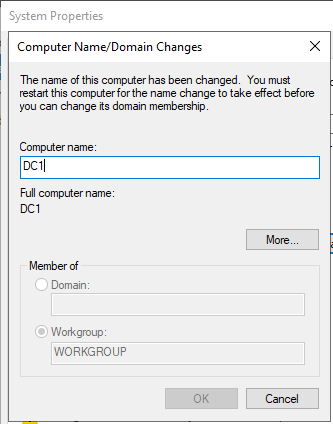
I set the Computer name to DC1 and clicked "OK," opting to restart later to modify the IP address before implementing the changes.
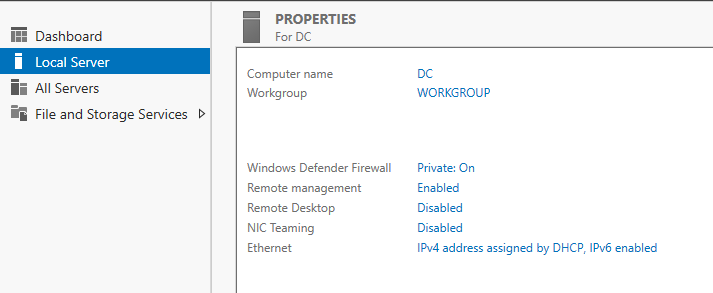
While still in Local Server, I navigated to Ethernet settings (IPv4 address assigned by DHCP, IPv6 enabled) to modify my IP address.
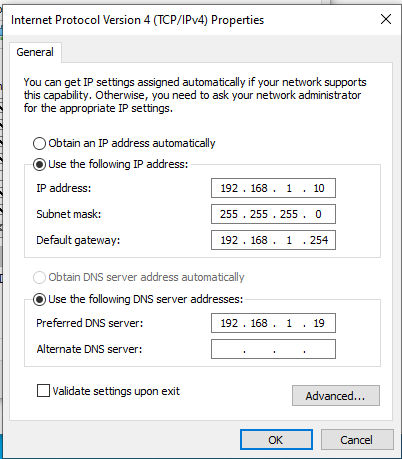
I accessed the Network Connections, selected Ethernet, right-clicked, and chose "Properties."
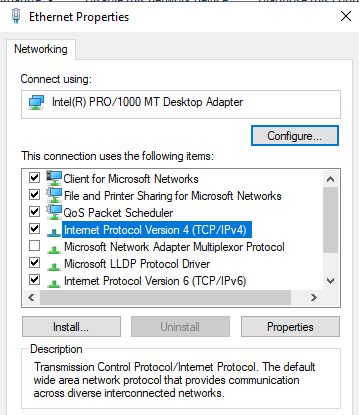
Continuing, choose (IPv4) and click on "Properties."
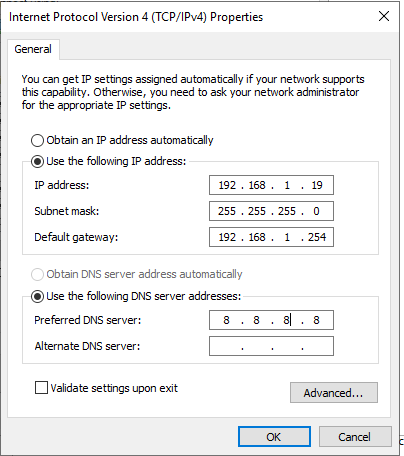
Adjust the IP addresses to meet your specific requirements. In my case, I made the necessary changes, as depicted in the image above, and then clicked "OK."
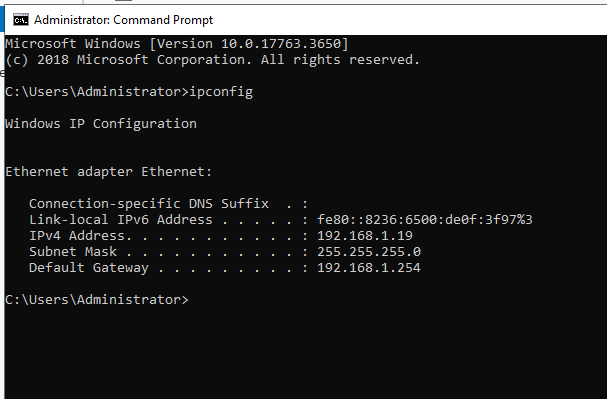
Once I configured the new static IP, I opened the command prompt (cmd) to verify whether the IP had changed according to my preferences.
To implement all the configurations made, restart the server.
Windows 10 Configuration
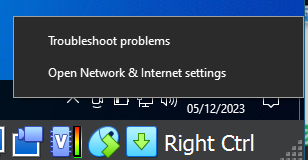
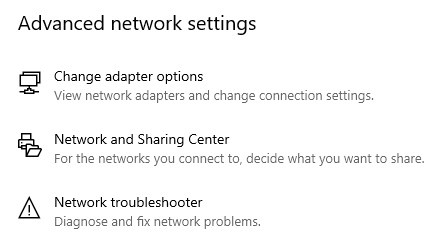
To access network settings, right-click on the network icon located in the bottom right corner of the system tray, and then choose "Open Network and Internet Settings."
Scroll down to click on Network and sharing center
Navigate to the upper right corner, where you will find the option labeled "change adapter settings." Click on it to access the network connections. Subsequently, replicate the precise steps used to set a static IP on Server 2019 at this point.
NOTE: I have set my preferred DNS server address to the IP address of my Server 2019 (DC1). This choice aligns with my intention to add specific roles on the server, including, but not limited to,"DNS" and "Active Directory."
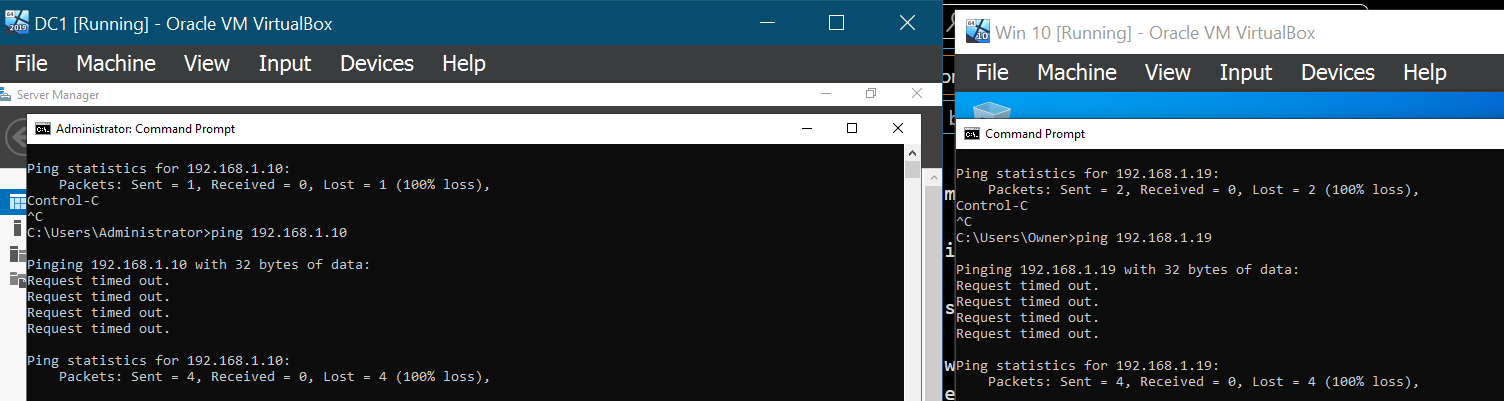
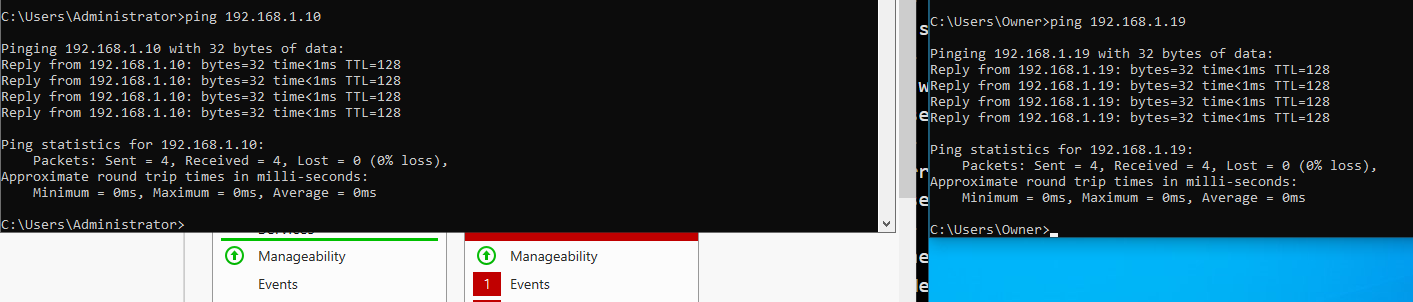
After successfully configuring the setup as described, I attempted to ping both Windows 10 and Server 2019, but unfortunately, neither machine responded.
To address this issue on both machines, I accessed network settings by right-clicking on the network icon in the bottom right corner of the system tray and selecting "Open Network and Internet Settings," similar to our previous steps for setting the static IP address.
Next, I scrolled down to click on "Network and Sharing Center" and navigated to the upper right corner, where I found the option labeled "Change advanced sharing settings." I ensured that all network discovery settings were turned on.
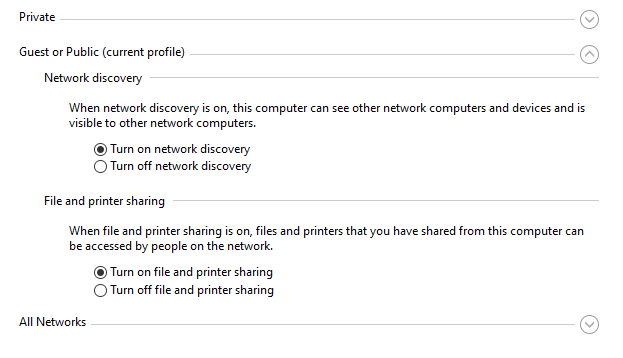
Note: It's important to highlight that we turned on network discovery for private, guest or public, and all networks to ensure comprehensive connectivity.
Repeat the same steps for DC1, and then attempt to ping your machines again to check for successful communication.
Roles importation into our DC1
To import roles into our DC1, follow these steps:
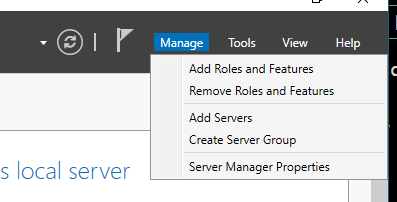
Open "Server Manager" on DC1 and navigate to "Manage" and select "Add Roles and Features."
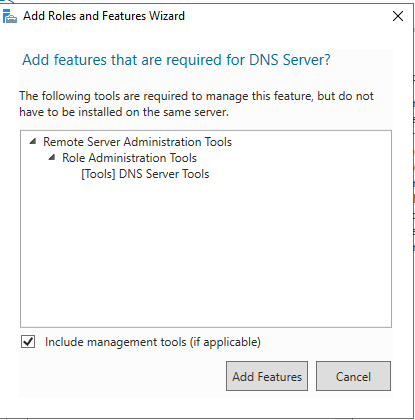
In the "Add Roles and Features Wizard," click "Next" until you reach the "Select server roles" page.
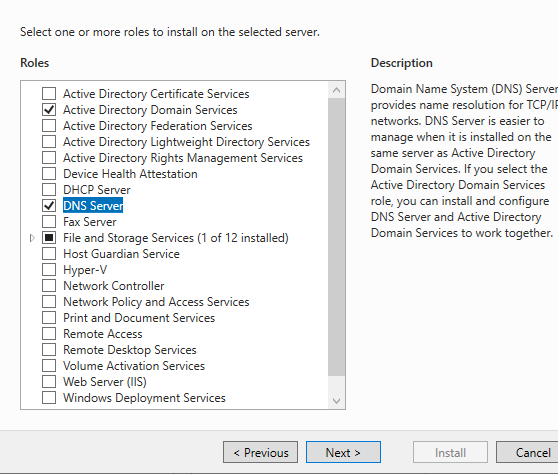
"Select the roles you wish to import, then click 'Next.' In this guide, I included features for DNS and Active Directory."
Proceed through the wizard, selecting the default options or configuring as needed. Complete the wizard and allow the roles to be installed on DC1.
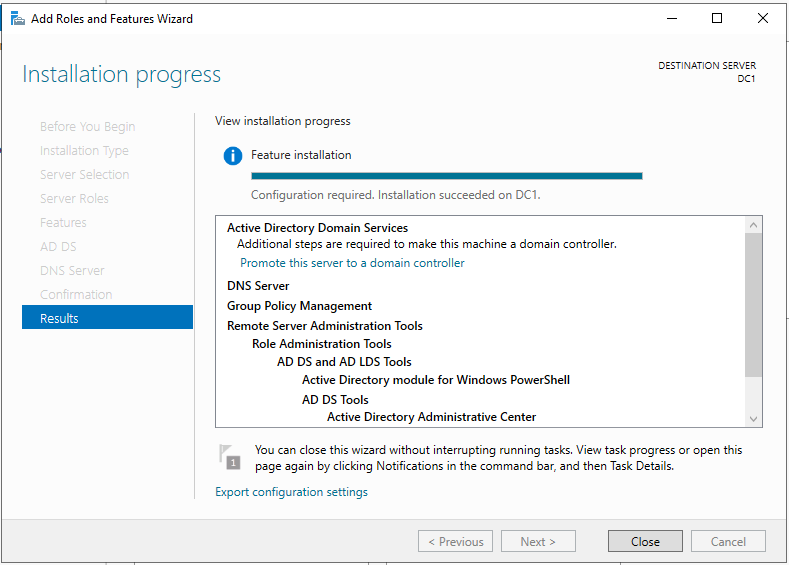
Now that the installation is complete, click on "Promote this server to a domain controller."
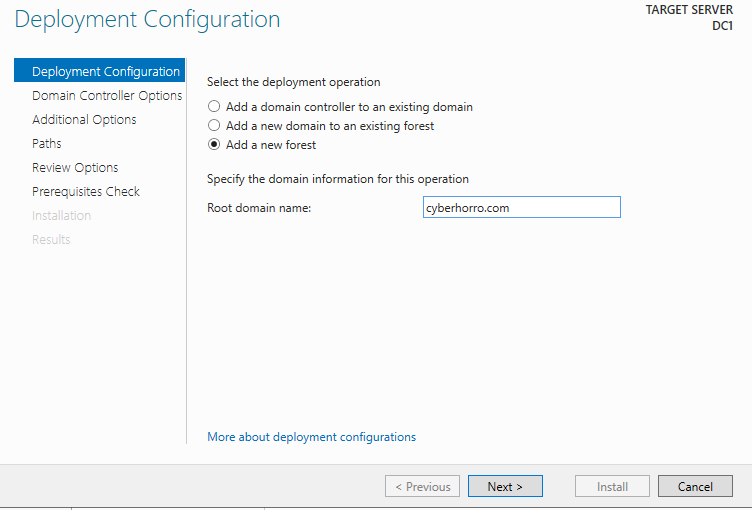
Choose "Add a new forest" since we are establishing a new environment from scratch.
For the "Root domain name," I am using cyberhorro.com, derived from my Twitter username, which is Cyb3r_H0rr0. Click "Next" to proceed.
It will prompt you to set a password. Ensure you follow best password practices when creating and entering the password.
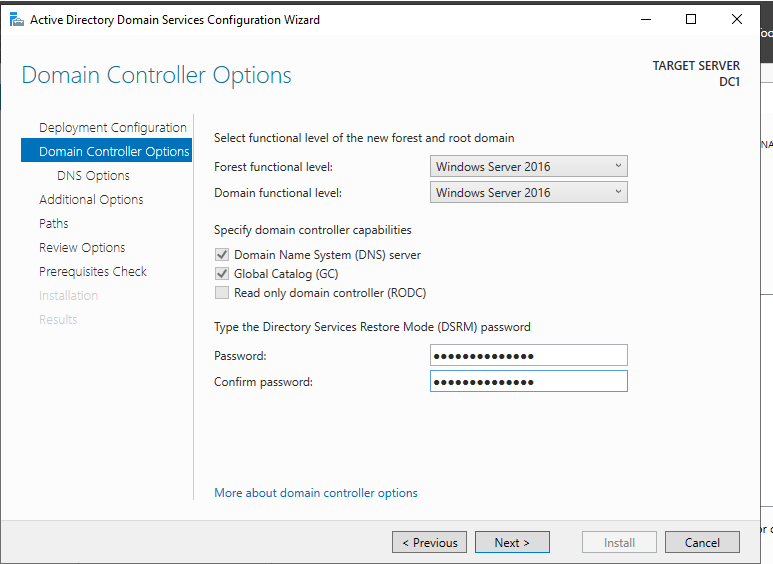
After setting the password, click "Next" through the subsequent prompts until the installation process completes.
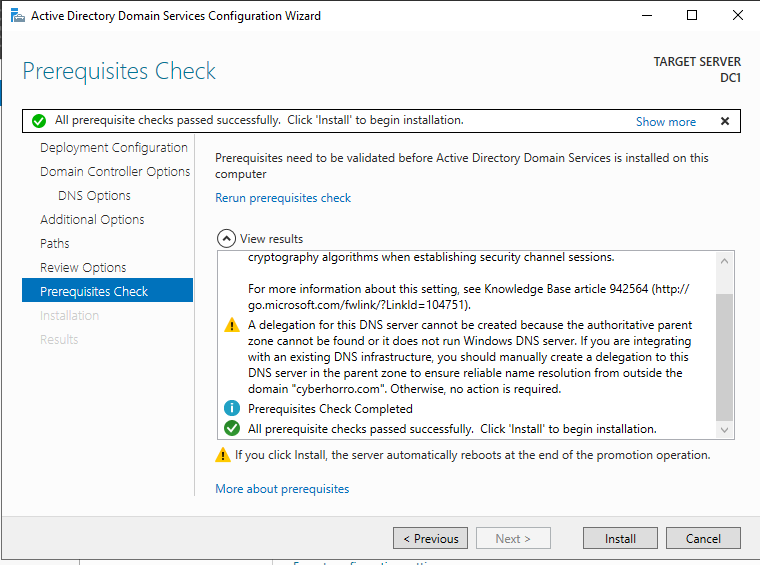
After clicking "Install," and once the installation process is complete, the server will automatically restart.
Now that the installation is complete, you can proceed to create users and explore group policies to tailor your Active Directory environment according to your requirements.
Creating users
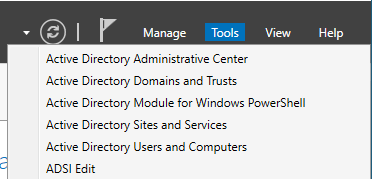
To create users in DC1, access "Active Directory Users and Computers" by going to the "Tools" menu and selecting the option for your Domain Controller.
Following these steps, you should be able to view your domain, which is cyberhorro.com. Expand it, and click on "Users" to access and manage all the built-in accounts.
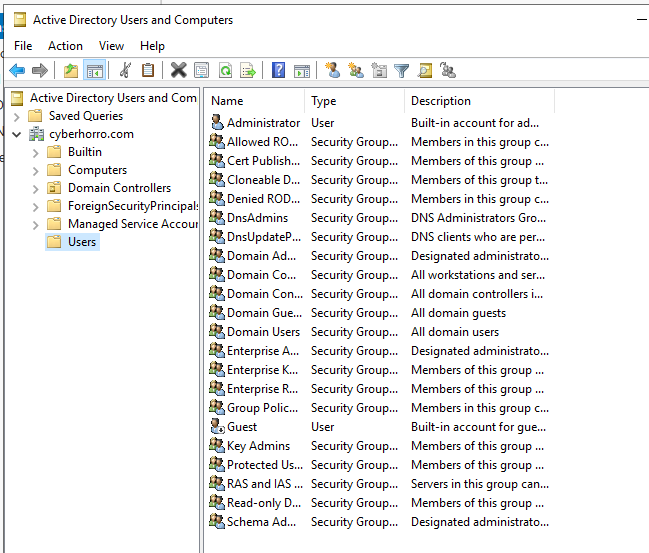
As security professionals, often disable the Guest account and consider renaming the default Administrator account in Active Directory. Another recommended practice is creating a new administrative account with a robust password to enhance access control. These steps contribute to a more secure Active Directory environment by mitigating common security risks and unauthorized access.
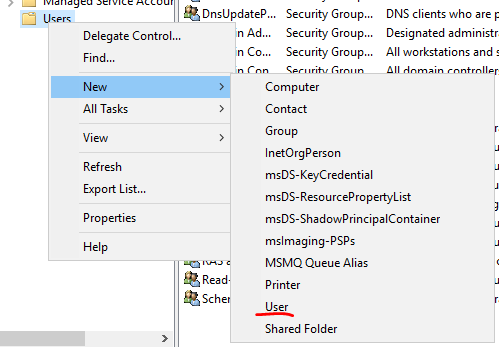
To add a new user, simply right-click on "Users," navigate to "New," and then click on "User."
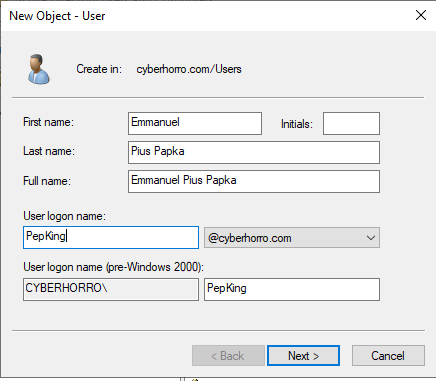
A dialog box will appear for you to input your details; I used my full name, as shown in the image below. Click "Next" to proceed.
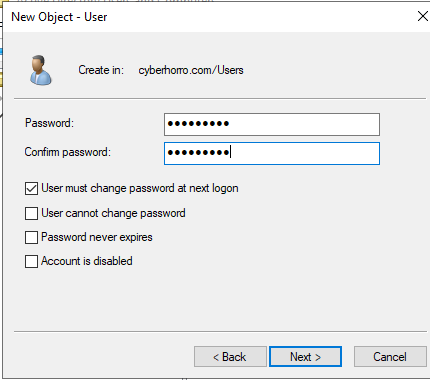
Set a password following best practices, click "Next," and then "Finish" to complete the creation of your new user.
Creating a group and adding the user to it
After creating the new user, double-click on the user to access its properties. Navigate to the "Member Of" tab to view the groups the user belongs to. In this instance, the user I created belongs to the "Domain Users" group.
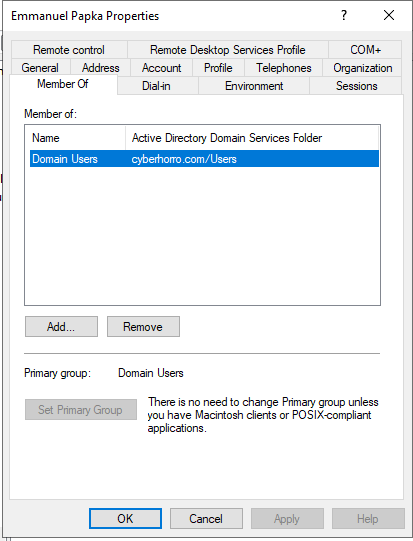
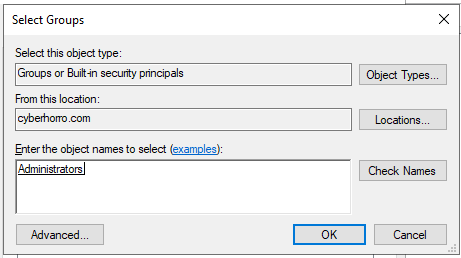
To include the user in the administration group, click on "Add." A dialog box will appear; type "admin," then click "Check Names." The administration group will be validated and added accordingly.
Click "OK," then proceed to click "Apply," and finally, click "OK" again to close the dialog box and confirm the changes.
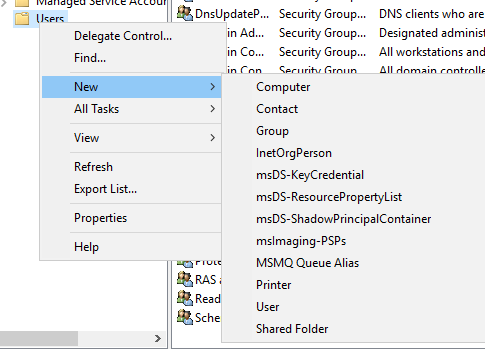
By right-clicking on "Users," navigating to "New," you can create various entities such as groups, computers, contacts, and more.
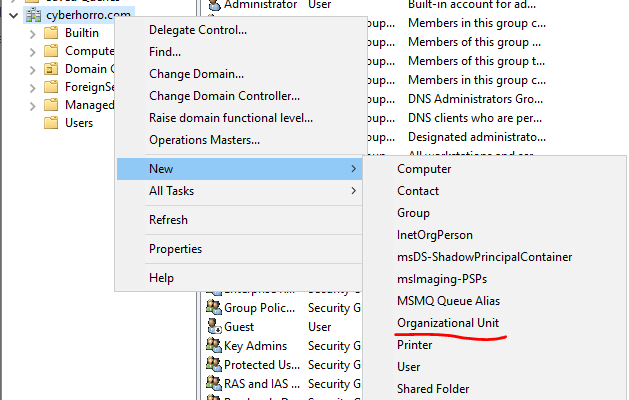
Creating Organization Units (OUs)
To create Organizational Units, right-click on our "cyberhorro" domain, go to "New," and you will find the option for "Organization Unit." Select it to initiate the creation process.
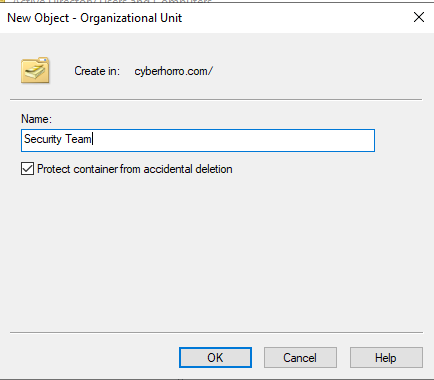
A dialog box will appear; write the names of the units you wish to create. In this case, you can create units for the security team and sales team.
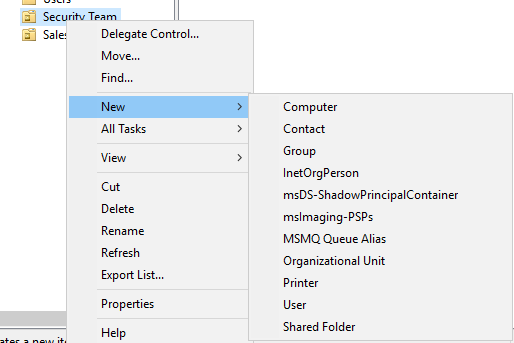
To add users, computers, and more to the unit you just created, right-click on the new unit and navigate to "New." From there, you can select the specific type of object you want to add, such as users or computers.
Joining Windows 10 on VirtualBox to the Recently Created Domain
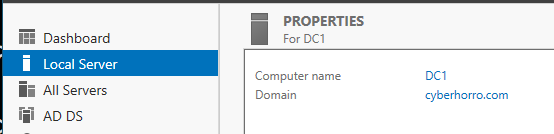
When you navigate to our Local Server, you'll observe that "cyberhorro.com" is now part of our domain.
To have our Windows 10 machine join the domain, go to the client machine (Windows 10), right-click on the Windows logo, and select "System."
Scroll down until you find "System protection" or "Advanced system settings," then click on either one to open up system properties. Click on "Computer Name" and then click on "Change." A dialog box will appear where you can change your client machine's membership from workgroup to domain. In the provided box, enter the name of the domain you want it to join, in our case, it is "cyberhorro."
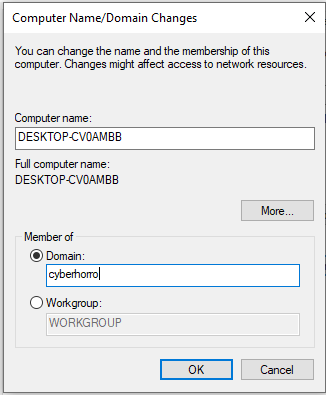
Note: Sometimes you may need to include the ".com" of the domain name for it to work successfully.
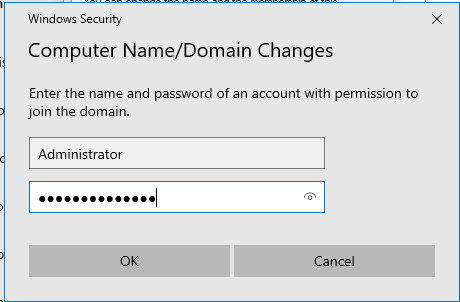
Click "OK," and you will be prompted to log in. Log in using the credentials of the Administrator account for the "cyberhorro" or "DC1," then click "OK."
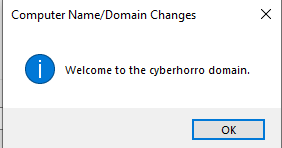
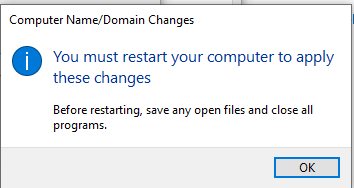
Once the process is completed, your client machine will have joined the domain and will be under the control of DC1. It will prompt you to restart for the changes to take effect.
After restarting, you should be able to log in using the user you created earlier, "pepking." Choose the "Other user" option during login to access the domain user account.
Note: If you have any questions or encounter challenges at any point, feel free to visit the contact section and reach out via email or any of the social media platforms. I'm here to assist you.